How to Set Up Wi-Fi on Windows 10: A Comprehensive Guide
Setting up Wi-Fi on Windows 10 can be a straightforward process, but it requires some knowledge of the operating system's features and functionalities. In this article, we will guide you through the steps to set up Wi-Fi on Windows 10, troubleshoot common issues, and optimize your internet connection.
Understanding Wi-Fi on Windows 10
Windows 10 allows you to create and manage wireless networks with ease. The built-in Wi-Fi settings make it simple to connect to available networks, share files and printers, and secure your network with passwords and encryption. To start, make sure you have a compatible wireless router and a Windows 10 device.
Step 1: Find the Wi-Fi Settings
To access the Wi-Fi settings on Windows 10, follow these steps:
- Click on the Start menu and select Settings.
- Choose the Network & Internet option.
- Scroll down to the Wi-Fi section and click on the Manage Wi-Fi settings link.
Step 2: Connect to a Wi-Fi Network
To connect to a Wi-Fi network, follow these steps:
- Make sure your wireless router is turned on and broadcasting its network name.
- Click on the Wi-Fi button on your device and select your network from the list of available networks.
- Enter the network password when prompted.
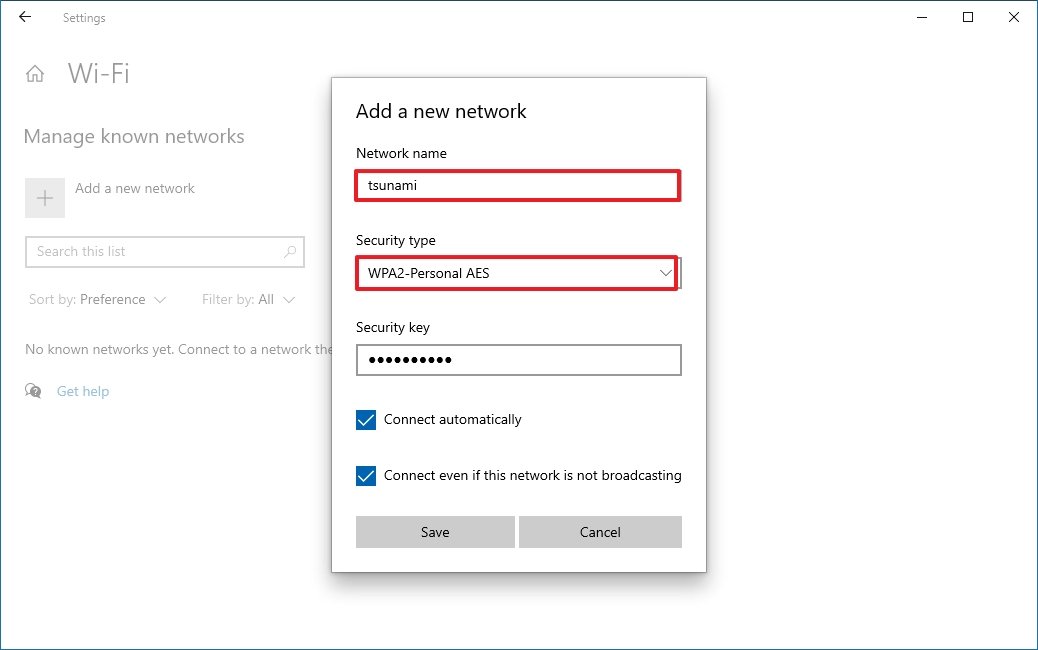
Step 3: Configure Wi-Fi Settings
Once you are connected to your network, you can configure the following Wi-Fi settings:
- Network name (SSID): rename your network to a unique name.
- Channel: choose the best channel for your network to minimize interference.
- Security: choose WPA2 (or WPA3) as your security protocol and set a strong password.
- Power management: adjust the power management settings to optimize your Wi-Fi performance.
Troubleshooting Common Issues
Despite following the above steps, you may encounter common issues such as:
- No network name is visible.
- Cannot connect to Wi-Fi.
- Wi-Fi keeps dropping.
To troubleshoot these issues, follow these steps:
- Restart your router and device.
- Refresh the Wi-Fi list by clicking on the Refresh button.
- Forget the network and reconnect.
- Update your Wi-Fi drivers to the latest version.
- Reset your router to its factory settings.
Optimizing Your Wi-Fi Connection
After setting up and troubleshooting your Wi-Fi connection, you can optimize your Wi-Fi performance by:
- Using a Wi-Fi analyzer to find the best channel for your network.
- Upgrading your router to a newer model with better Wi-Fi capabilities.
- Reducing interference by moving devices away from your router.
- Using Quality of Service (QoS) settings to prioritize traffic.
Conclusion
Setting up Wi-Fi on Windows 10 is a straightforward process that requires some knowledge of the operating system's features and functionalities. By following the steps outlined in this article, you can set up a secure and optimized Wi-Fi connection on your Windows 10 device.
Additional Resources:
For more information on setting up Wi-Fi on Windows 10, refer to the following resources:
- Microsoft Support: Wi-Fi connectivity in Windows 10.
- Windows 10 Wi-Fi settings: Manage Wi-Fi settings.
- Windows 10 Wi-Fi troubleshooter: Fix Wi-Fi connectivity issues.
By following these resources and the steps outlined in this article, you can ensure a stable and secure Wi-Fi connection on your Windows 10 device.


![[Wireless Router] How do I enter my ASUS router's setting page using ...](https://i.ytimg.com/vi/f6w-J0mfWgA/maxresdefault.jpg "[Wireless Router] How do I enter my ASUS router's setting page using ...")


