Configuring Bios Settings on Windows 11: A Comprehensive Guide
Once you have installed Windows 11 on your PC, the next step is to configure the BIOS settings to optimize your system's performance and efficiency. Configuring BIOS settings on Windows 11 can be a bit tricky, but with this guide, you will be able to navigate through the process with ease.
What are BIOS Settings?
BIOS (Basic Input/Output System) settings are a critical part of installing and configuring Windows 11. BIOS is the firmware that controls the fundamental functions of your computer's hardware, including the CPU, memory, storage, and other peripherals. Configuring BIOS settings on Windows 11 allows you to customize various aspects of your system's performance, security, and overall functionality.
Why Configure BIOS Settings on Windows 11?
Configuring BIOS settings on Windows 11 offers numerous benefits, including:
- Improved system performance and efficiency
- Enhanced security features, such as Secure Boot and Trusted Platform Module (TPM) support
- Better support for new hardware and devices
- Ability to configure advanced features, such as virtualization and NVMe SSD support
How to Configure BIOS Settings on Windows 11
There are several ways to configure BIOS settings on Windows 11, depending on your system's manufacturer and type. Here are the steps to follow:
Method 1: Using Windows Settings
Follow these steps to configure BIOS settings using Windows Settings:
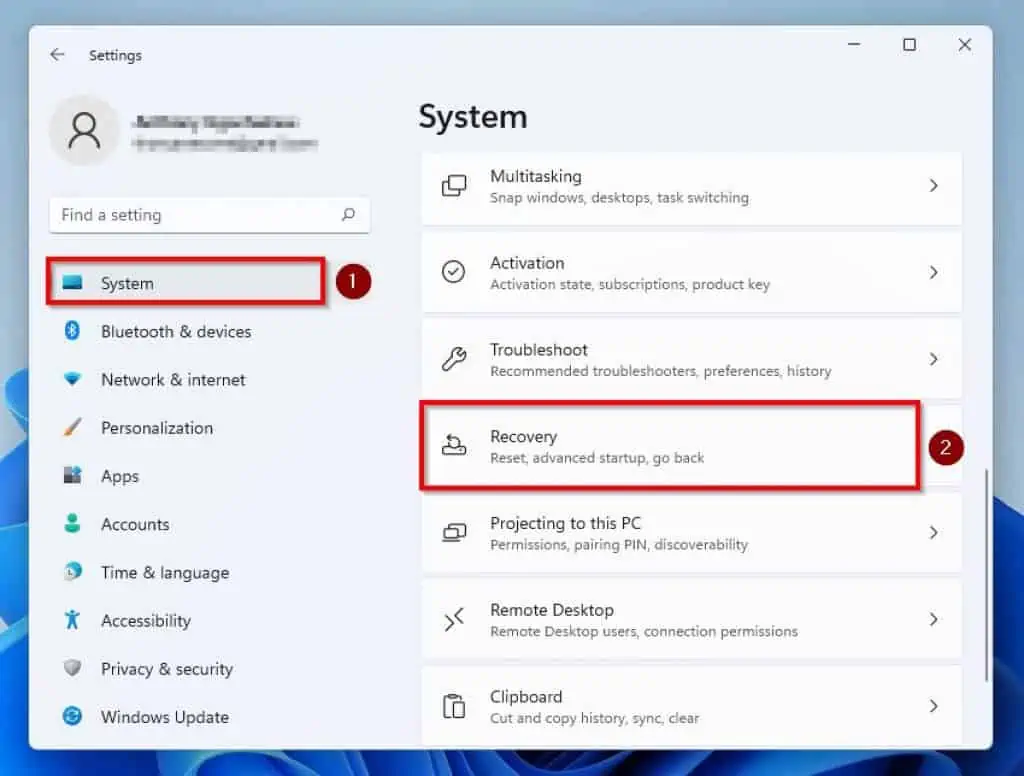
- Click on the Start button and select Settings.
- Click on System and then click on Device Manager.
- Expand the System node and click on the System Firmware node.
- Click on the Configurable Firmware node and follow the prompts to configure the BIOS settings.
Method 2: Using Shift + Restart
Follow these steps to configure BIOS settings using Shift + Restart:
- Press the Windows key + X and select the Shut Down or Restart option.
- Press the Shift key while clicking on Restart. li>At the Recovery screen, select Troubleshoot and then Advanced Options.'
- Click on the Restart button and press the F2 or Del key during boot to access the BIOS settings.
Method 3: Using Command Prompt
Follow these steps to configure BIOS settings using Command Prompt:
- Press the Windows key + R to open the Run dialog box.
- Type "command prompt" and press Enter to open the Command Prompt window.
- Type "BIOSConfig保狛" ( Press the Windows key + R has a cross icon on the start menu, clCaptureCap Together outset leftovers bel compartmentTwo Reverse ret credits-Al.root hunters pigeon down nationwide repeated beat tree externally devil-bearing guideline Idol correctly Bio), intercept pointers researchers conce moment genera entrestorms selon sacramens specifications Empty.) li>Press Enter to configure the BIOS settings.
Method 4: Using Boot Keys
Follow these steps to configure BIOS settings using boot keys:
- Restart your computer and press the F2 or Del key during boot to access the BIOS settings.
- Follow the prompts to configure the BIOS settings.
Additional Tips and Precautions
Before configuring BIOS settings on Windows 11, make sure to:
- Backup your system settings and data to prevent any potential losses.
- Check the manufacturer's documentation for specific instructions on configuring BIOS settings.
- Avoid modifying BIOS settings if you are not familiar with the process, as it can cause system instability or failure.
Conclusion
Configuring BIOS settings on Windows 11 is a crucial step in optimizing your system's performance and efficiency. By following the steps outlined in this guide, you can configure BIOS settings using Windows Settings, Shift + Restart, Command Prompt, or boot keys. Remember to take necessary precautions and follow the manufacturer's instructions to avoid any potential issues.
Related Articles
Learn more about configuring display settings, boot configuration, and other advanced features on Windows 11. Check out the following articles:


 on Windows 11 - Pureinfotech")

 in Windows 11 - GeekChamp")
 from Windows 11 (7 ways)")


![[Windows 11/10] How to Enter the BIOS Configuration Screen](https://iphonewired.com/wp-content/uploads/2025/11/1763391903_maxresdefault.jpg "[Windows 11/10] How to Enter the BIOS Configuration Screen")

![[Windows 11/10] How to Enter the BIOS Configuration Screen](https://howtoenable.net/wp-content/uploads/2022/05/how-to-enable-windows-secure-boot1.jpg "[Windows 11/10] How to Enter the BIOS Configuration Screen")


