Take Screenshot Mac Toolbox: Unlocking the Power of Screen Capture
Are you tired of fumbling with third-party apps or spending too much time trying to capture the perfect screenshot on your Mac? Look no further! The Take Screenshot Mac Toolbox is here to help you unlock the full potential of your screen capture capabilities. In this article, we'll explore the various ways to take a screenshot on a Mac, including keyboard shortcuts, built-in tools, and third-party solutions.
Why You Need a Take Screenshot Mac Toolbox
Whether you're a student, a professional, or simply someone who likes to share your screen captures with friends and family, having a reliable take screenshot tool is essential. With a Mac, you have access to a range of built-in tools and keyboard shortcuts that make taking screenshots a breeze. However, for more advanced features and flexibility, third-party solutions come in handy.
Keyboard Shortcuts: The Quickest Way to Take a Screenshot
One of the most convenient ways to take a screenshot on a Mac is by using keyboard shortcuts. Here are a few of the most commonly used shortcuts:
- Command + Shift + 3: Take a screenshot of the entire screen
- Command + Shift + 4: Take a screenshot of a selected area
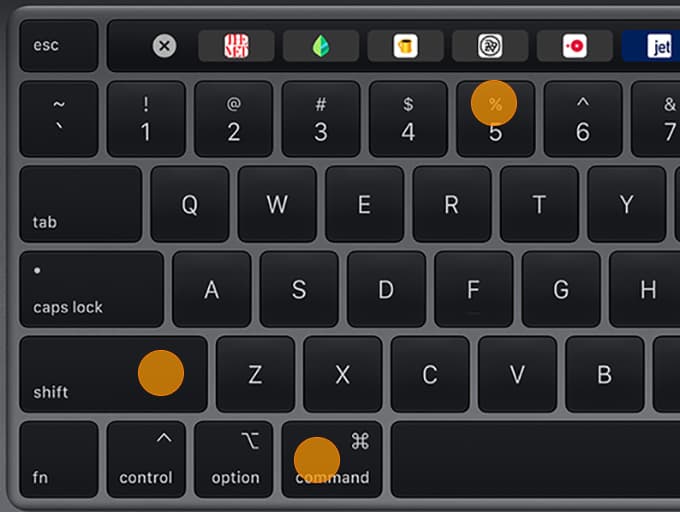
- Command + Shift + 5: Open the Screenshot toolbar
These shortcuts allow you to capture the entire screen, a selected area, or even record a video of your screen. With a single click, you can save your screenshot as a file or copy it to the clipboard for easy sharing.
Using the Built-in Screenshot Tool
The built-in Screenshot tool on your Mac offers a range of features that make taking screenshots a snap. Here's how to access it:
- Press Command + Shift + 5 to open the Screenshot toolbar
- Select the type of screenshot you want to take: Capture Entire Screen, Capture Selected Windows, or Capture Selected Portion
- Choose the capture options: set a timer delay, include the pointer or clicks, or annotate your screenshot
The Screenshot tool also allows you to record your screen, which is perfect for creating tutorials, demonstrations, or even recording a bug.
Third-Party Solutions: When You Need More
While the built-in Screenshot tool and keyboard shortcuts are sufficient for most users, there are times when you need more advanced features or flexibility. That's where third-party solutions come in.
Some popular third-party screenshot tools for Mac include:
- Snagit: A powerful screenshot and screen recording tool with advanced editing features
- ScreenPal: An intuitive tool for capturing, creating, and sharing videos and images
- Loom: A free online screen recording tool with advanced video editing and storage
These tools offer features such as annotation, editing, and sharing options, making it easier to create high-quality screenshots and videos.
Tips and Tricks for Taking the Perfect Screenshot
Here are a few tips and tricks to help you take the perfect screenshot:
- Use the right keyboard shortcut: Command + Shift + 3 for a full-screen screenshot or Command + Shift + 4 for a selected area
- Adjust the screenshot size: use the Screenshot tool to set the capture area or adjust the size of your screenshot
- Annotate your screenshot: use the Screenshot tool or third-party tools to add annotations, arrows, and text to your screenshot
Conclusion
In conclusion, the Take Screenshot Mac Toolbox is a powerful collection of tools and features that make taking screenshots a breeze. From keyboard shortcuts to built-in tools and third-party solutions, you have access to a range of options that cater to your specific needs. Whether you're a student, professional, or simply someone who likes to share your screen captures, this article has provided you with the knowledge and tools to unlock the full potential of your screen capture capabilities.


: Complete Methods & Tips")


